Completing Your First Service
Congratulations on setting up PoolOps! Let's walk through completing your first service stop from start to finish.
Before You Start
Make sure you have:
- The PoolOps app installed and logged in
- At least one customer added
- Your test kit ready
- Your phone charged
Add a test customer (like your own pool or a friend's) to practice before going to real customers.
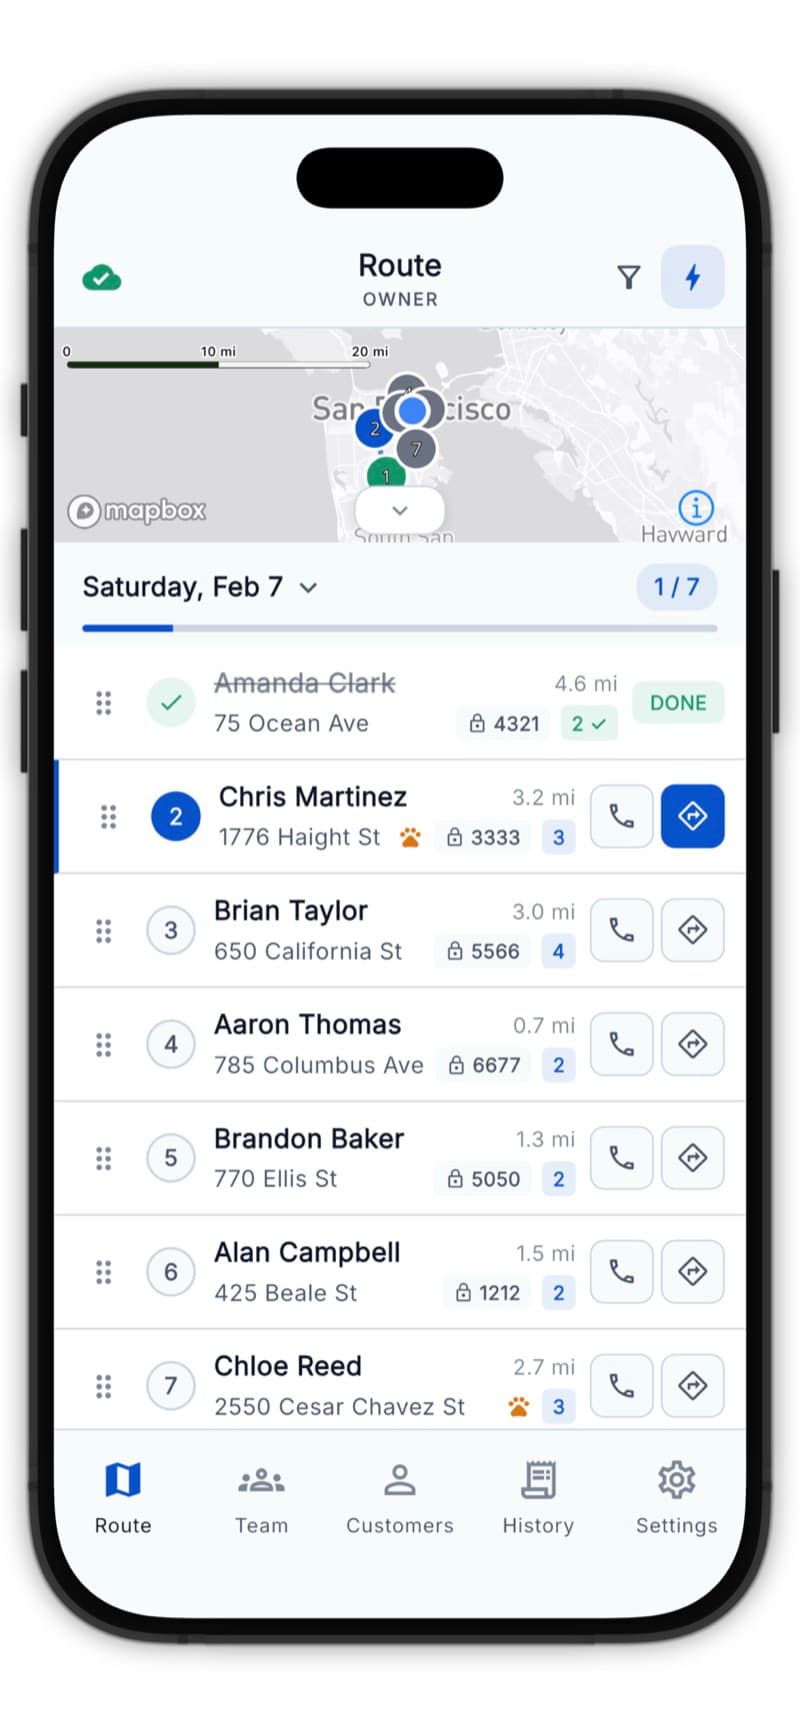
Step 1: Open Your Route
Open the app and tap the Route tab. You'll see today's scheduled stops.
Step 2: Navigate to the Customer
Tap the customer card, then tap Navigate to get directions.
PoolOps works with Apple Maps, Google Maps, and Waze - choose your preferred app in Settings.
Step 3: Start the Service
When you arrive, tap Start Service on the customer card.
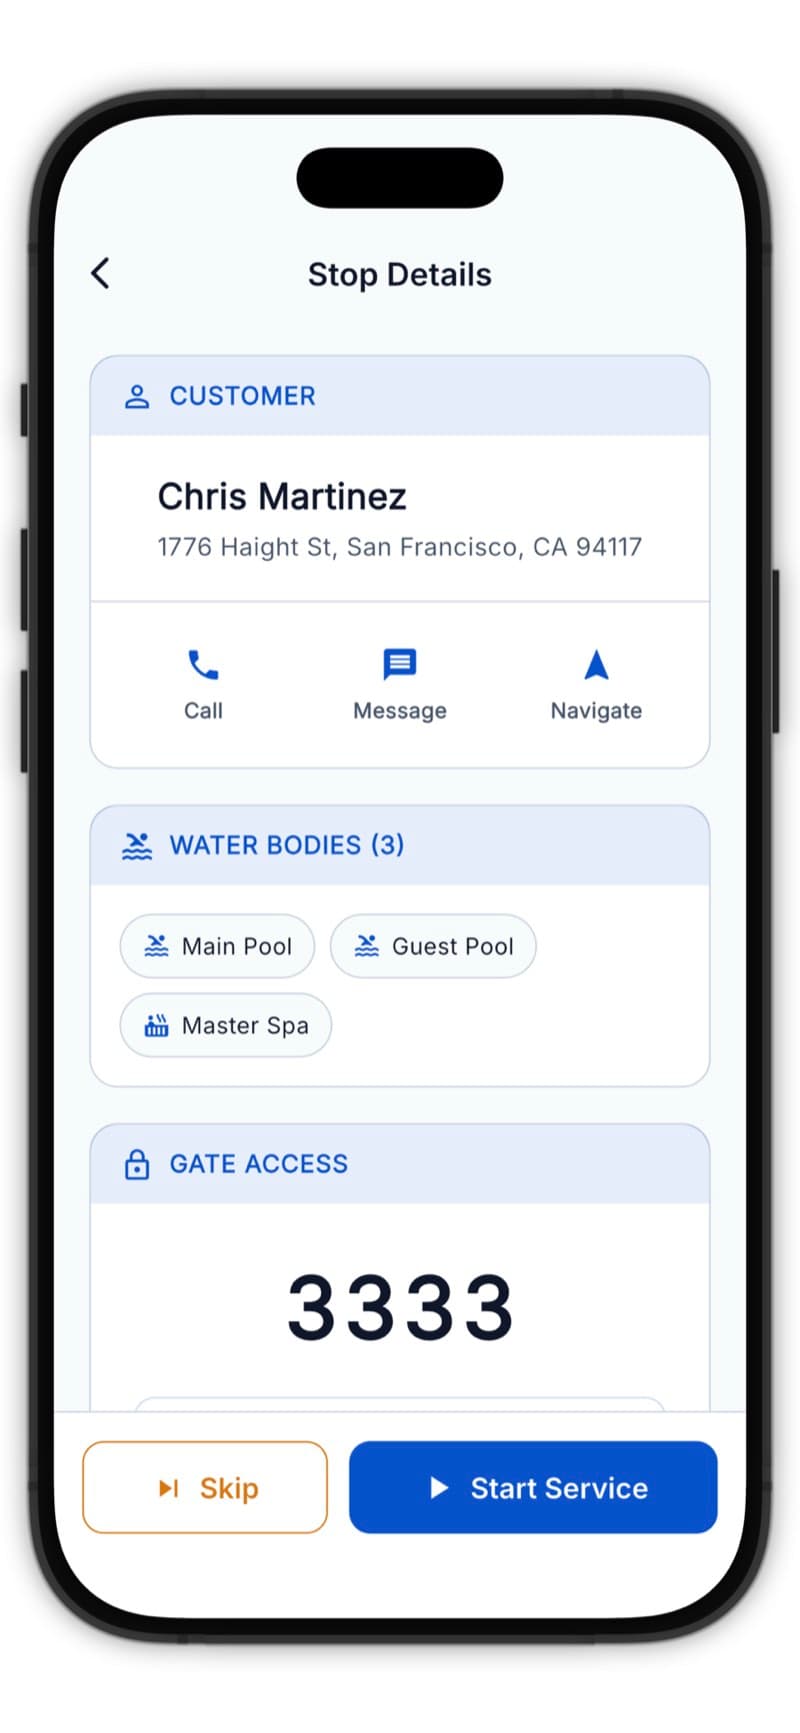
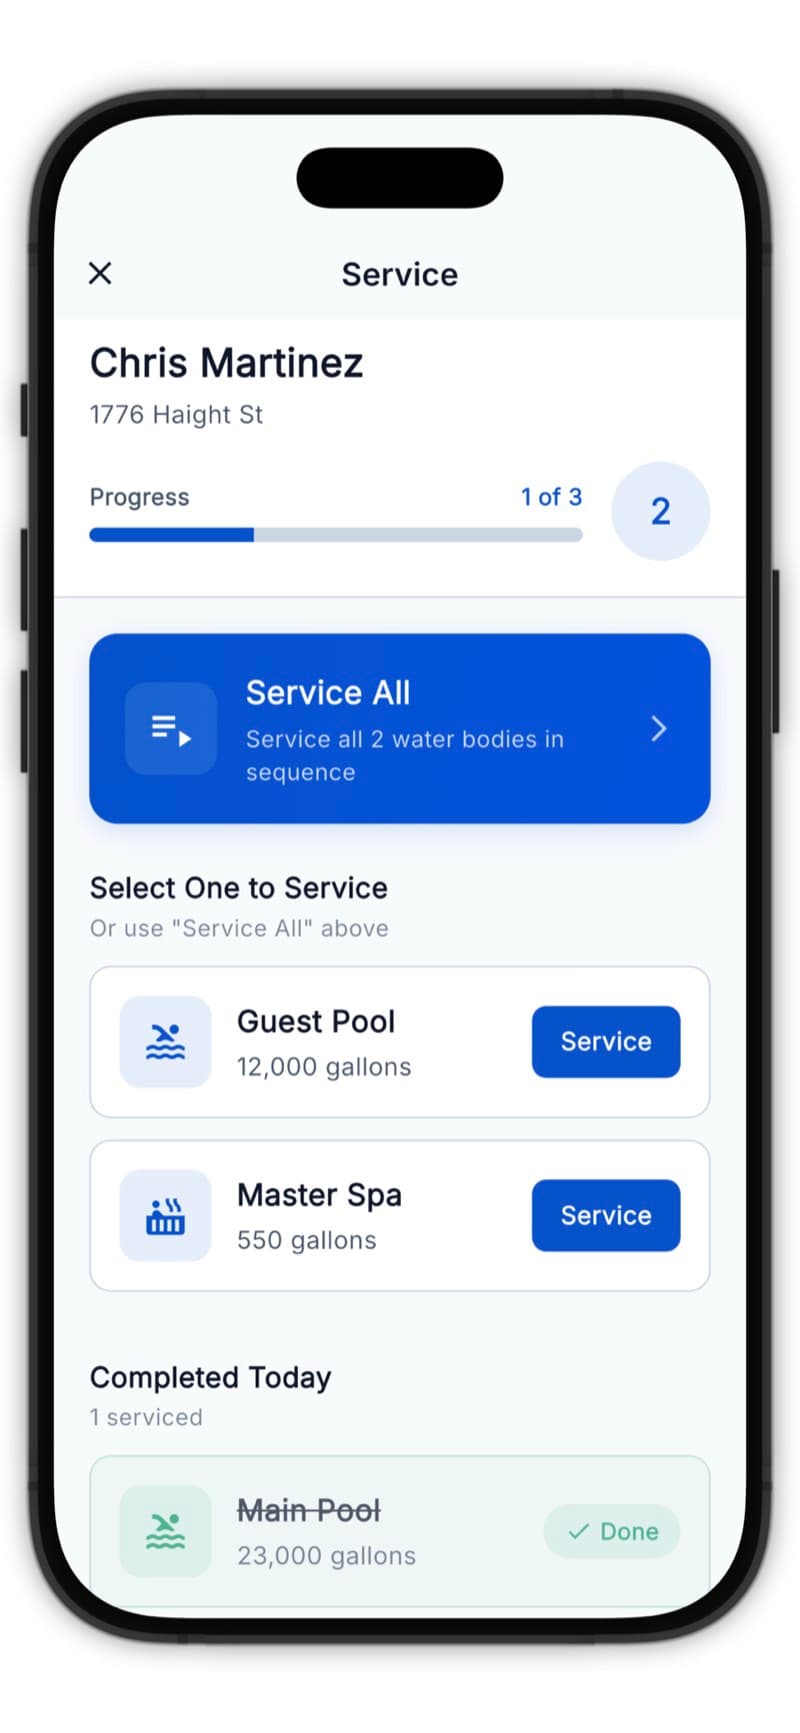
For Multi-Pool Customers
If the customer has multiple water bodies (pool + spa, for example):
- Select which one to service first, OR
- Tap Service All to go through each one
Step 4: Enter Water Readings
Test the water and enter your readings:
- pH - Tap the field and enter the value
- Free Chlorine - From your test kit
- Alkalinity - Total alkalinity reading
- Calcium Hardness - If you test for it
- CYA - Cyanuric acid level
- Temperature - Water temperature
You don't need to enter every reading - just the ones you test for. The LSI will calculate with available data.
Step 5: Review LSI Results
After entering readings, you'll see the LSI score and recommendations.
The LSI tells you if the water is:
- Balanced (green) - Water is healthy
- Corrosive (blue) - Needs adjustment
- Scaling (orange) - Needs adjustment
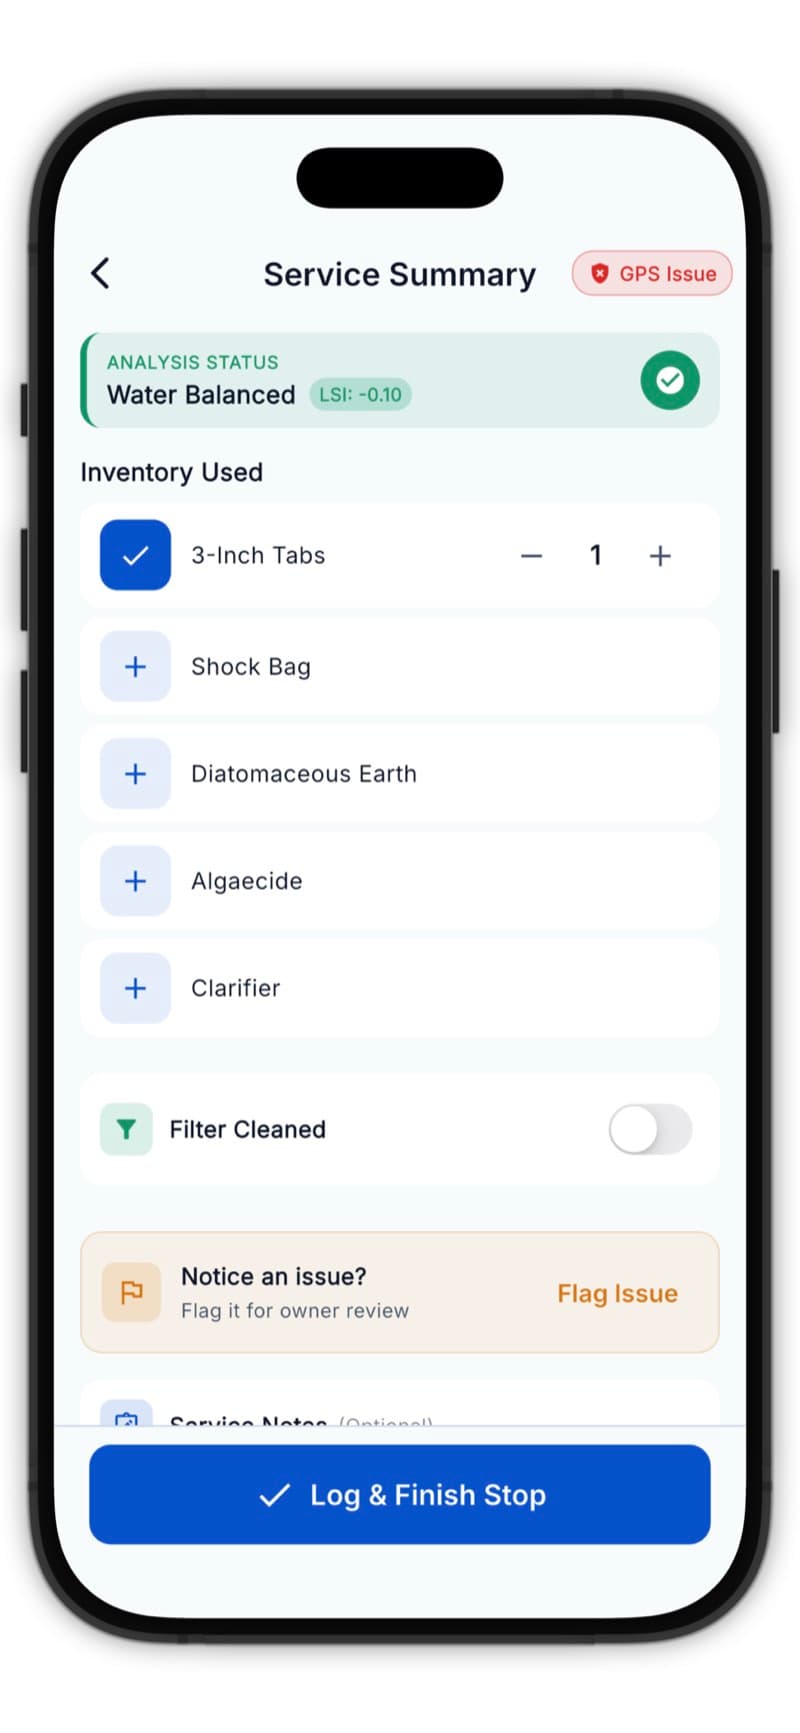
Step 6: Add Chemicals
Record what chemicals you add:
- Tap Add Chemical
- Select the chemical type
- Enter the amount
- Choose the unit (oz, lbs, gallons)
The app suggests dosages based on the pool volume and readings - use these as a starting point.
Step 7: Complete Checklist (If Applicable)
If you have a checklist configured, mark items as complete:
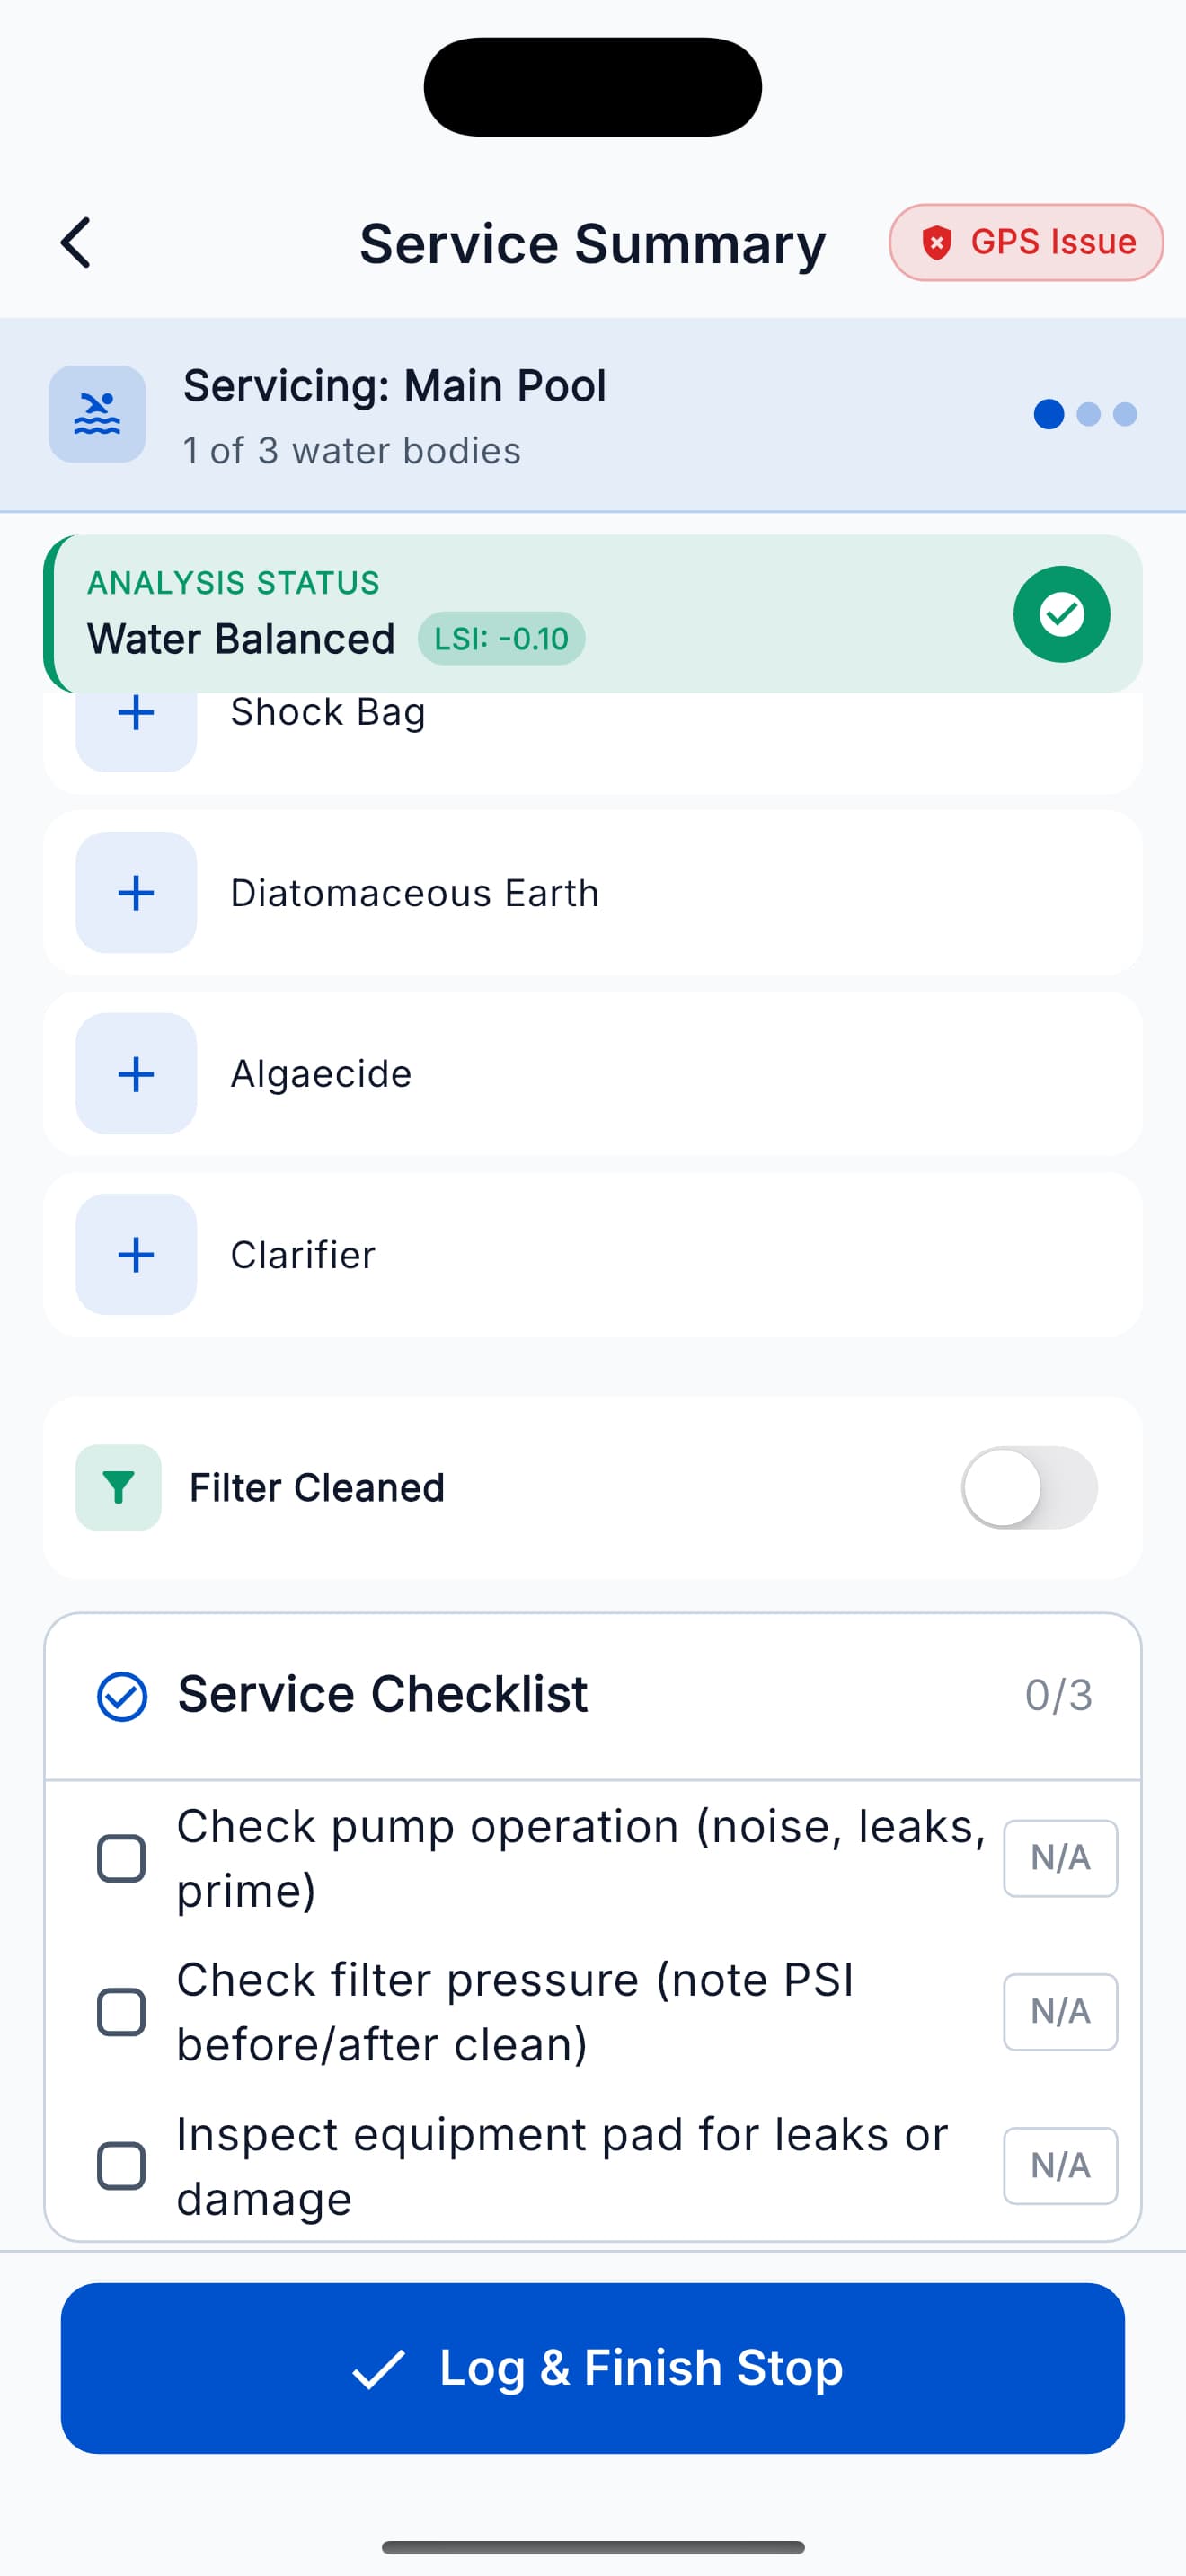
- Empty skimmer basket
- Clean pump basket
- Check filter pressure
- Brush walls
Step 8: Take a Photo
Capture a proof-of-service photo:
- Tap the camera icon
- Take a photo of the pool
- The photo is automatically attached
Photos help customers see their pool was serviced and provide documentation if questions arise.
Step 9: Add Notes (Optional)
Add any notes about the service:
- "Filter pressure high - may need cleaning soon"
- "Gate code changed to 1234"
- "Dog was in backyard"
Step 10: Complete the Service
Tap Complete Service to finish.
You'll be asked if you want to send a service report to the customer. Tap Send Report to text them a link to their report.
Viewing Your Completed Service
After completing, the stop shows as done on your route:
You can tap the completed stop to view or edit the service log if needed.
What's Next?
Great job completing your first service! It gets faster and easier with practice.