Completing Your Daily Route
The Route tab is your command center for the day. Here's how to efficiently work through your service stops.
Viewing Your Route
Open the PoolOps app and tap the Route tab. You'll see:
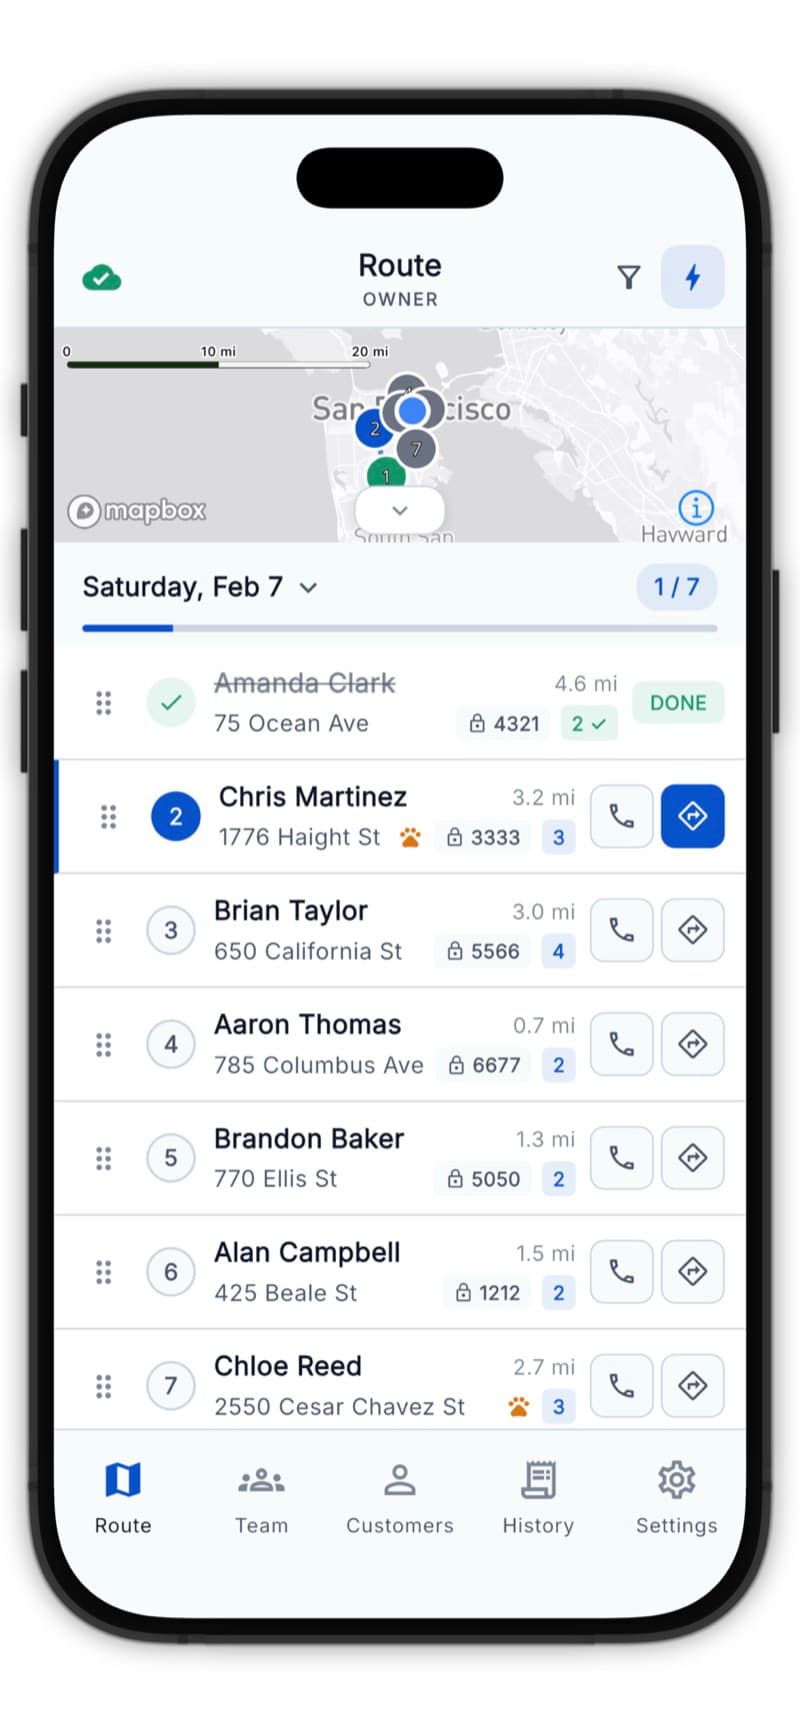
- Today's stops listed in optimized order
- Customer names and addresses for each stop
- Status indicators showing completed vs. pending stops
- Water body badges showing progress for multi-pool customers (e.g., "1/3")
Starting Your Day
Optimize Your Route
Before heading out, tap the Optimize button to reorder stops for minimum drive time.
- Tap Optimize
- Choose your starting point (current location, home, or saved location)
- Choose your ending point (open-ended, last stop, or saved location)
- Tap Optimize Route
Optimize every morning - traffic patterns change and new stops may have been added.
Navigation
Tap any stop to see options:
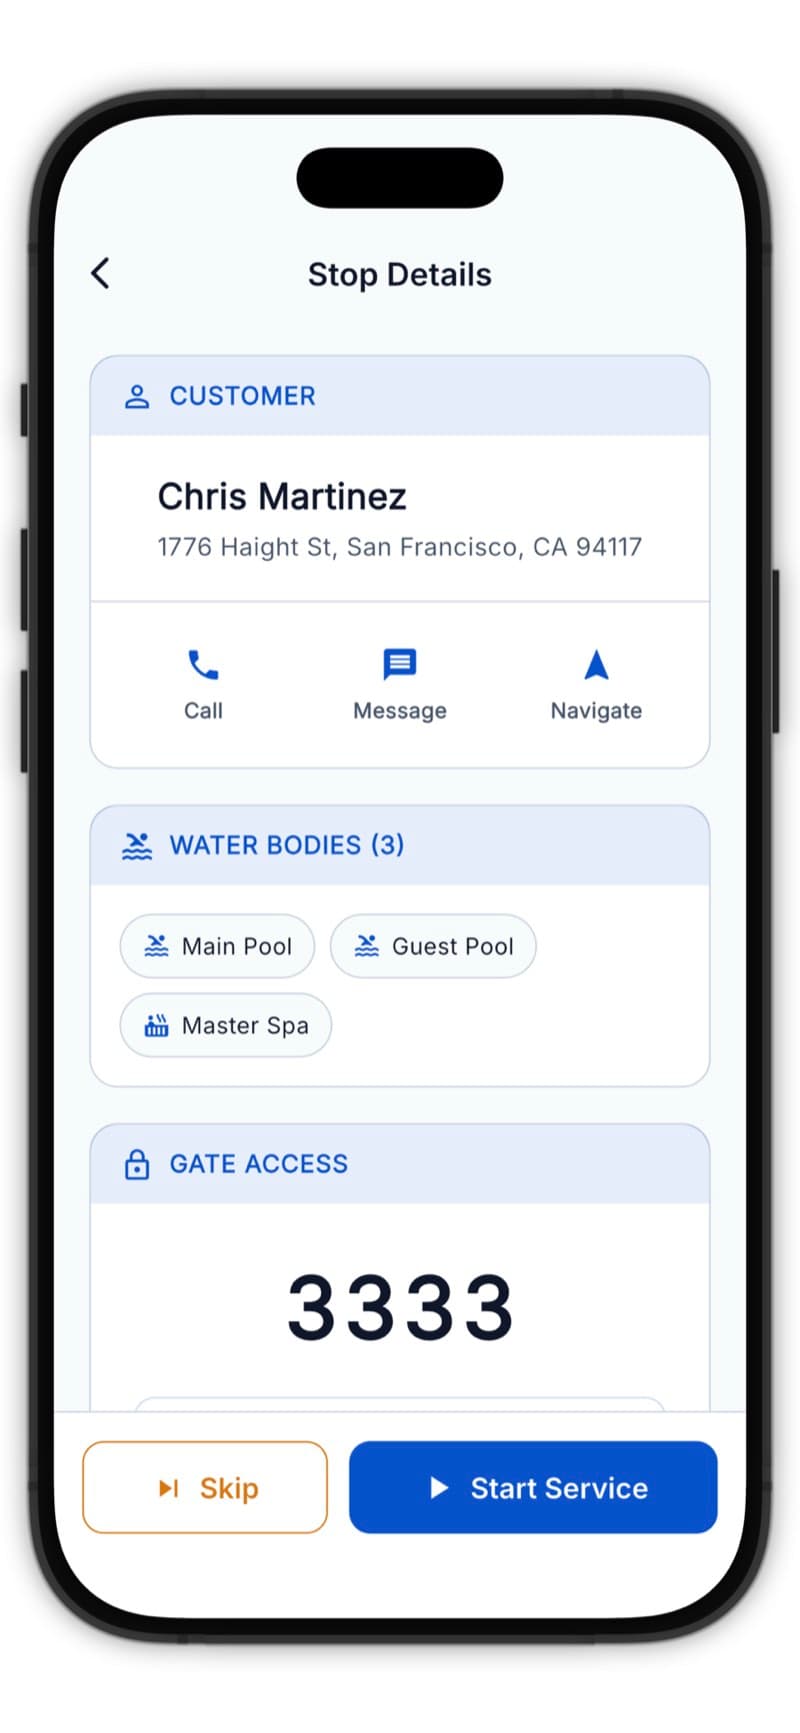
- Navigate - Opens your preferred maps app with directions
- Start Service - Begin recording the service
- View Details - See customer info and history
Completing a Service Stop
Step 1: Arrive and Start Service
When you arrive at a customer's location:
- Tap the customer card
- Tap Start Service
Step 2: Water Body Selection (Multi-Pool Customers)
If the customer has multiple water bodies (pool, spa, etc.):
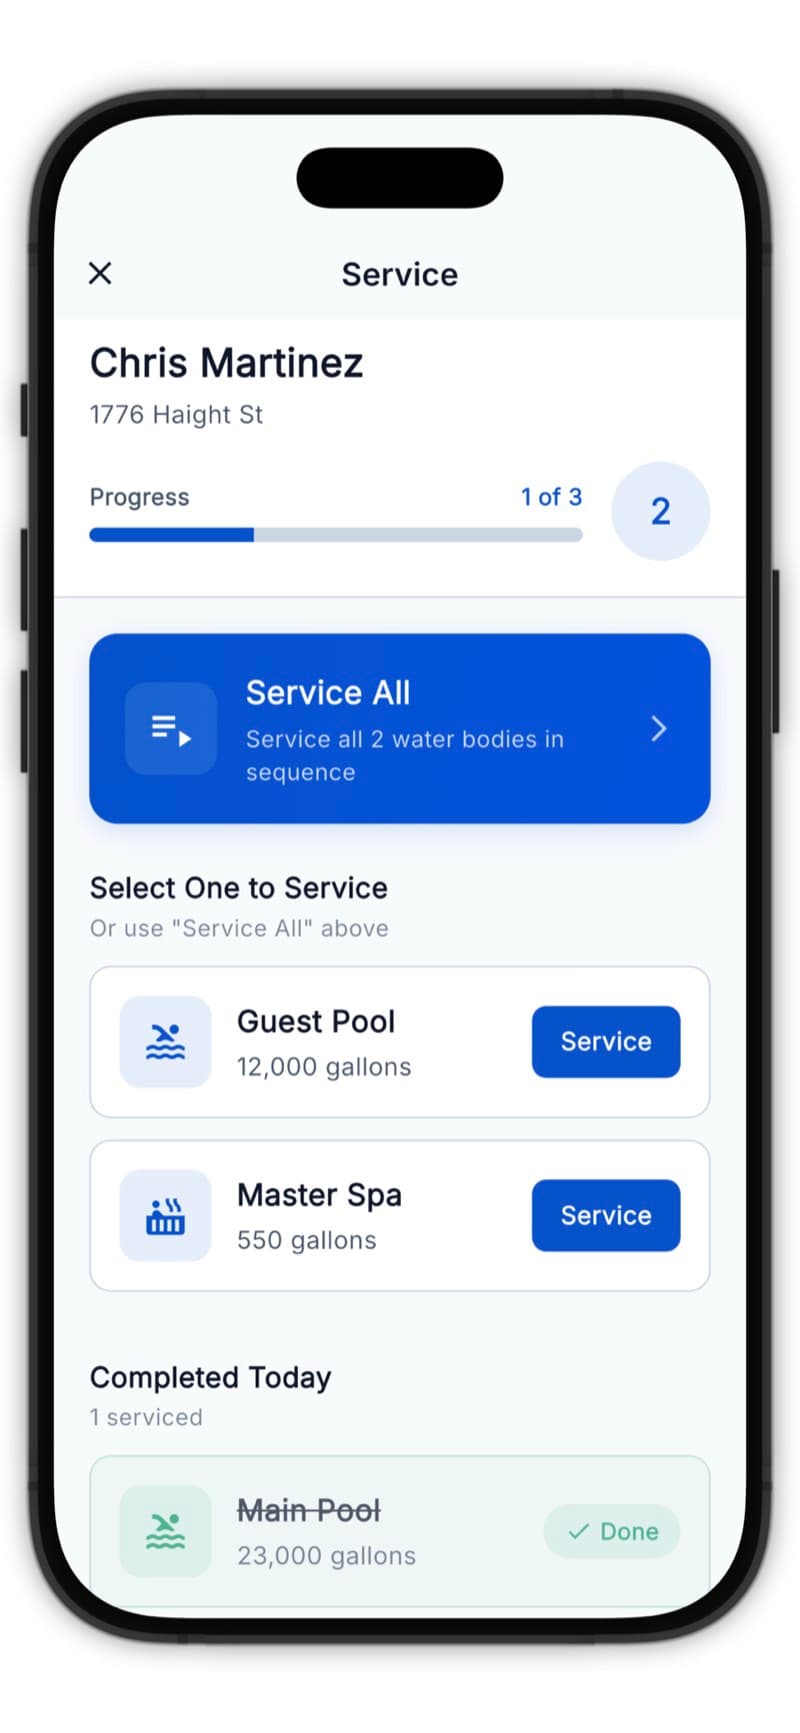
- Select which one to service, OR
- Tap Service All to work through each one
Step 3: Enter Water Readings
Record the current water chemistry:
- pH level
- Chlorine (free and total)
- Alkalinity
- Calcium hardness
- Cyanuric acid (CYA)
- Temperature
Tap any reading field twice to open a number pad for faster entry.
Step 4: View LSI & Recommendations
The app automatically calculates the LSI score and provides:
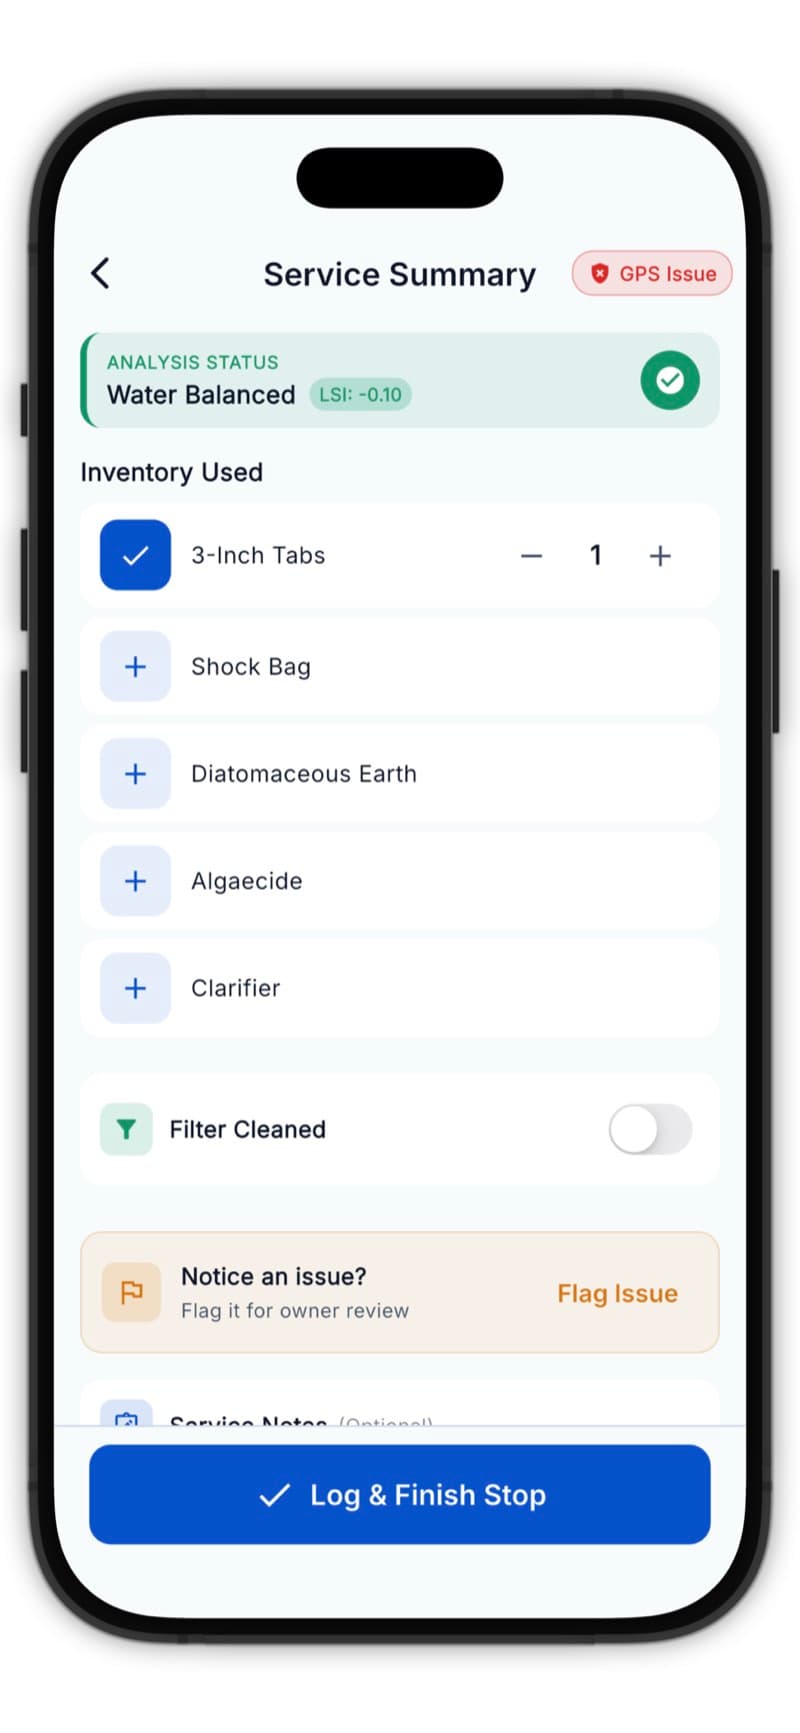
- Balance status (corrosive, balanced, or scaling)
- Chemical dosage recommendations based on pool volume
- What to add to bring water into balance
Step 5: Add Chemicals & Complete Tasks
Record what you did:
- Chemicals added (type and amount)
- Filter cleaned (yes/no)
- Checklist items completed (for team accounts)
- Any notes about the service
Step 6: Take Photos
Capture proof-of-service photos:
- Tap the camera icon
- Take a photo of the pool
- Add multiple photos if needed
Take a wide shot showing the whole pool - this gives customers confidence you were there.
Step 7: Complete the Stop
Tap Complete Service to finish. The app will:
- Save all readings and data
- Mark the stop as complete
- Optionally prompt to send a service report
Handling Issues
If you encounter a problem (broken equipment, green pool, etc.):
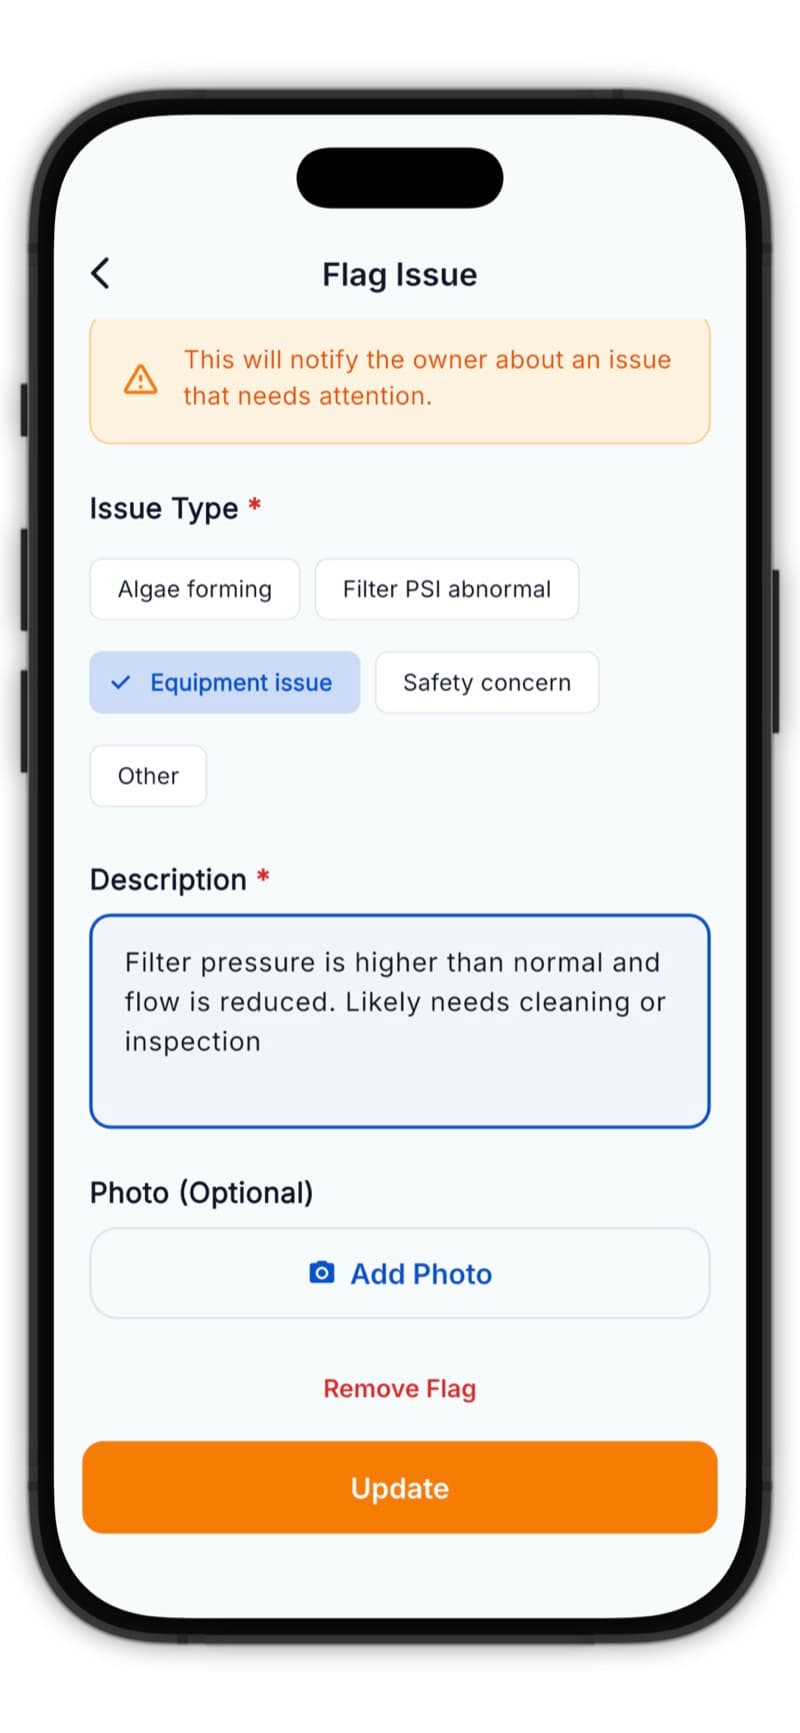
- Tap Flag Issue during service
- Describe the problem
- Take photos of the issue
- The business owner will be notified
Always flag issues rather than ignoring them - it protects you and keeps the customer informed.
Multi-Water-Body Service
For customers with pools AND spas:
- Complete each water body separately
- The route card shows progress (e.g., "1/2")
- You can service them all at once or come back later
Tips for Efficiency
- Optimize in the morning - Get the best route before you leave
- Use voice-to-text - Speak your notes instead of typing
- Batch photos - Take all photos at once before completing
- Check tomorrow - Glance at tomorrow's route before ending your day
- Keep app updated - New features and fixes come regularly
Most techs complete services 20-30% faster after their first week with PoolOps.